Bounding Box on a Skeletal Mesh Actor
This section will explain how to add custom bounding boxes to skeletal mesh actors in the scene.
These custom bounding boxes will provide 2D regions of interest and 3D Object Oriented bounding boxes in the annotation data of various sensors like the Camera. In this example, the bounding box on a vehicle’s rear windshield will be added and displayed when using a camera sensor. This is useful when the user would like to get ground truth information about some area of a visible actor.
Add a Custom Bounding Box to a Vehicle
In this tutorial, a custom bounding box is added to sedan_monoDrive_01 on the rear windshield.
-
Navigate to
VehiclesunderContent Browserin the Scenario Editor. -
Right click on the
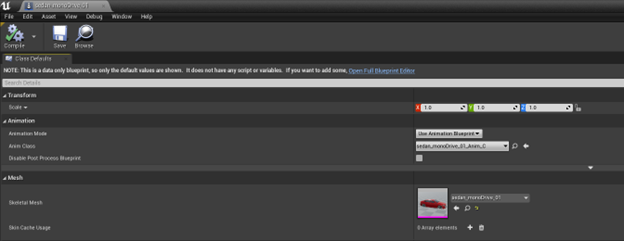
sedan_monoDrive_01vehicle and click on ‘Edit’ as shown below
-
Double click on the Skeletal Mesh icon
-
Click on Physics and the result will look like the image below.

-
Right click on vehicle_root and select Add Shape → Add Box (The box added is highlighted in the image below)

-
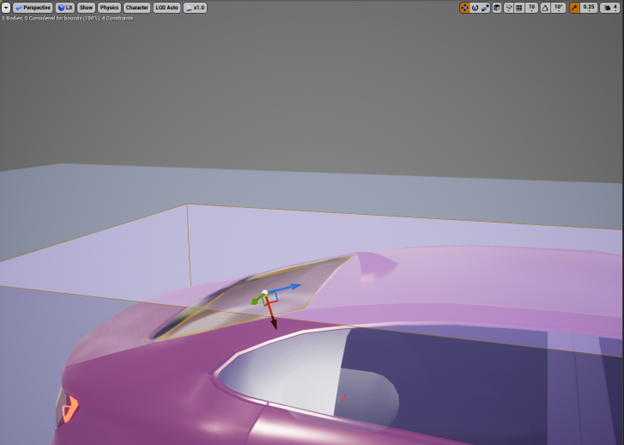
Place cursor around the area the box was added and zoom in (using mouse wheel scroll up direction) to the vehicle till the newly added box is visible.
A. On the top of the window, change the tool to
Select and Translate ObjectsB. Click on the box shape added – the box should be movable in
x,yandzdirections.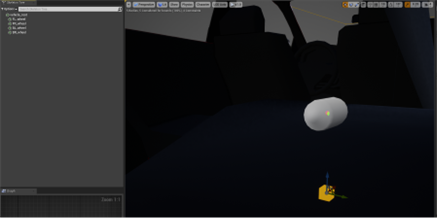
-
Use the moving tools to place it on center of rear windshield of the vehicle
A. Zoom out of the vehicle using the mouse wheel’s scroll down gesture.

B. Click on Perspective → then click on
Backto change to the rear view of the vehicle.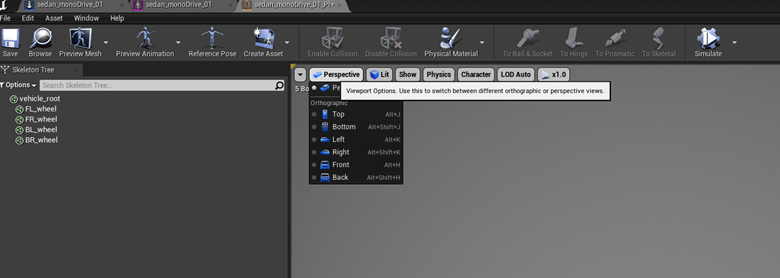
C. Locate the box and align it to the rear windshield of the vehicle as close as possible (still using the
Select and Translate Objectstool)
D. Click on ‘Back’ and change the view to ‘Left’ or ‘Right’.
E. Click on the
Select and Rotate objectstool on the top right corner of the window. Rotate the windshield box to align with the angle of the windshield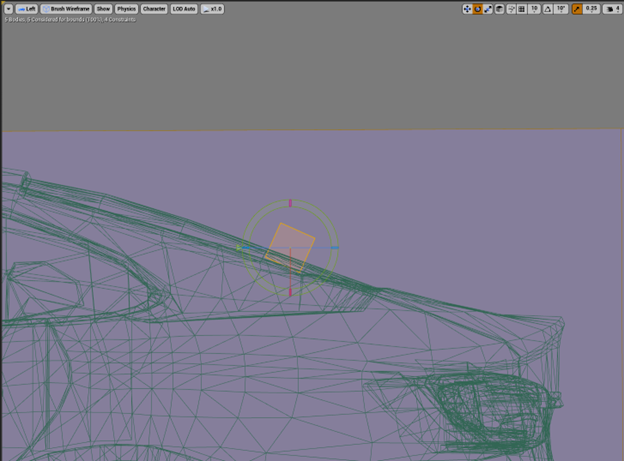
F. Change to ‘Back’ view of the vehicle. Use the
Select and Scale objectstool to scale the size of the added box to fit the rear windshield (use the mouse to drag in the upward and rightward directions).
G. Keep switching between the Perspective, Left and Back views until the box looks aligned with the rear windshield.
-
Click on ‘Save’ on the top left corner.
-
With the newly added box still selected, look for Details→Body Setup→Primitives→Boxes→Name. Enter the name ‘rear_windshield’
-
Uncheck the ‘Contribute to Mass’ parameter so the box only serves annotation purposes. This disables the overall mass of the added shape.
-
Click on ‘Save’ on the top left corner.
Setting up the C++ client
This section of the document explains how to modify code on the camera_sensor.cpp client example to specifically extract the above modified 2D bounding box with the label ‘rear_windshield’ using annotations
fc_config.annotation.desired_tags = {"vehicle"};
    for (auto &bbox : annotation.second.bounding_boxes_2d)
               if(bbox.name == "rear_windshield") {
                cv::rectangle(img, cv::Point(int(bbox.xmin), int(bbox.ymin)),
                              cv::Point(int(bbox.xmax), int(bbox.ymax)),
                              cv::Scalar(0, 0, 255));
               }