ROS Quick Start
Guide
The monoDrive ROS Client is part of the monoDrive C++ Client but uses the ROS
API for sending messages to and from the monoDrive Simulator or Scenario Editor.
It can be found in the monoDrive-client repo under cpp-client/ros-examples.
To get started make a contact the NI monoDrive Team.
Ubuntu 18.04 Prerequisites
-
ROS Note: Tested with melodic
-
ROS Bridge:
$ sudo apt-get install ros-melodic-rosbridge-suite
monoDrive ROS Packages and example build
-
Execute the following to build the ROS packages:
$ cd ros-examples $ catkin_make $ source devel/setup.bash -
Add the setup file to your .bashrc to add the packages to your ros path on terminal load:
$ echo "source <path/to/devel/setup.bash>" >> ~/.bashrc
monoDrive Simulator and Client network setup
NOTE: If you are running both the client and simulator on the same machine you can skip this section as the networking defaults are for local host.
If you are running the simulator and client on separate machines the following networking settings must be configured.
-
Set the IP address and port IDs for the machine running the simulator and the machine running the ros bridge
-
In the configuration file,
simulator_control/confg/simulator.json, set the IP and port (default is9090) of the machine that will host the ros bridge:"ros": { "port": 9090, "server": "192.168.86.167" }, -
and the IP and port of the simulator:
"server_ip": "192.168.86.168",
"server_port": 8999,
-
-
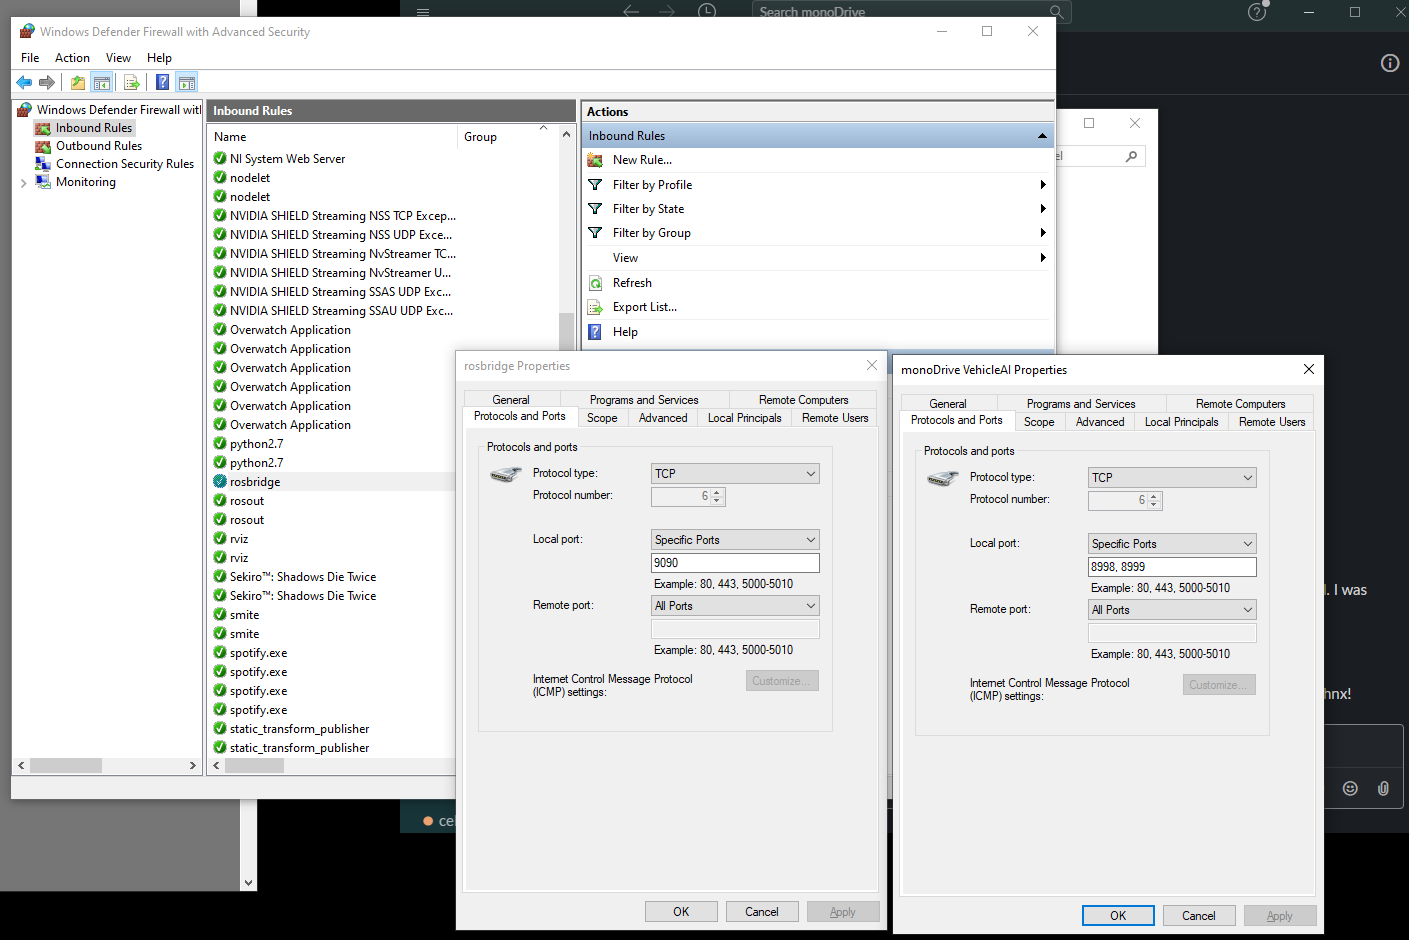
Forward the ports on both machines (
9090and8999) from step 1 or disable the firewalls on both machines.Windows: Set the inbound rules for the desired ports in the "Windows Defender Firewall with Advanced Security" dialog which can be found by typing this into the taskbar's search function. The rules should look like the following:
Linux: The firewall rules in Ubuntu are controlled by
ufw. To open the necessary ports, execute the following:$ sudo ufw allow 9090 $ sudo ufw allow 8999