Bounding Box on a Static Mesh Actor
This section will explain how to add custom bounding boxes to static mesh actors in your scene.
These custom bounding boxes will provide 2D regions of interest in the annotation data of various sensors like the Camera. In this case, the bounding box on a traffic sign and streetlight will be modified and displayed when using a camera sensor. This is useful when the user would like to get ground truth information about some area of a visible actor.
For example, the user may want to get a bounding box just for the face of a traffic sign for classification purposes and would otherwise like to ignore the other parts like the shaft of the sign.
Display Only the Sign's Bounding Box of a Traffic Sign
The goal of this section is to use the existing bounding boxes on a traffic sign’s static mesh and display only the desired region of interest (For example, the actual sign and not the shaft)
-
Open the
Content Browseron the monoDrive Scenario Editor. -
Navigate to
Content→Maps -
Open the
Straightaway5kmap. The purpose of this step is to find the sign and its static mesh from the map.
-
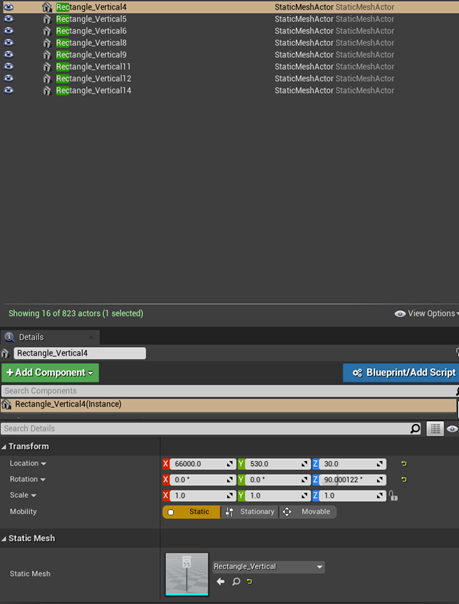
In the World Outliner, look for ‘Rectangle_Vertical’.
-
Select one of them, and open the Static Mesh by double-clicking, from the 'Details' window as seen below. Please note that all the 'Rectangular_Vertical signs' will be updated when modifying the static mesh of ‘Rectangle_Vertical’ signs.
-
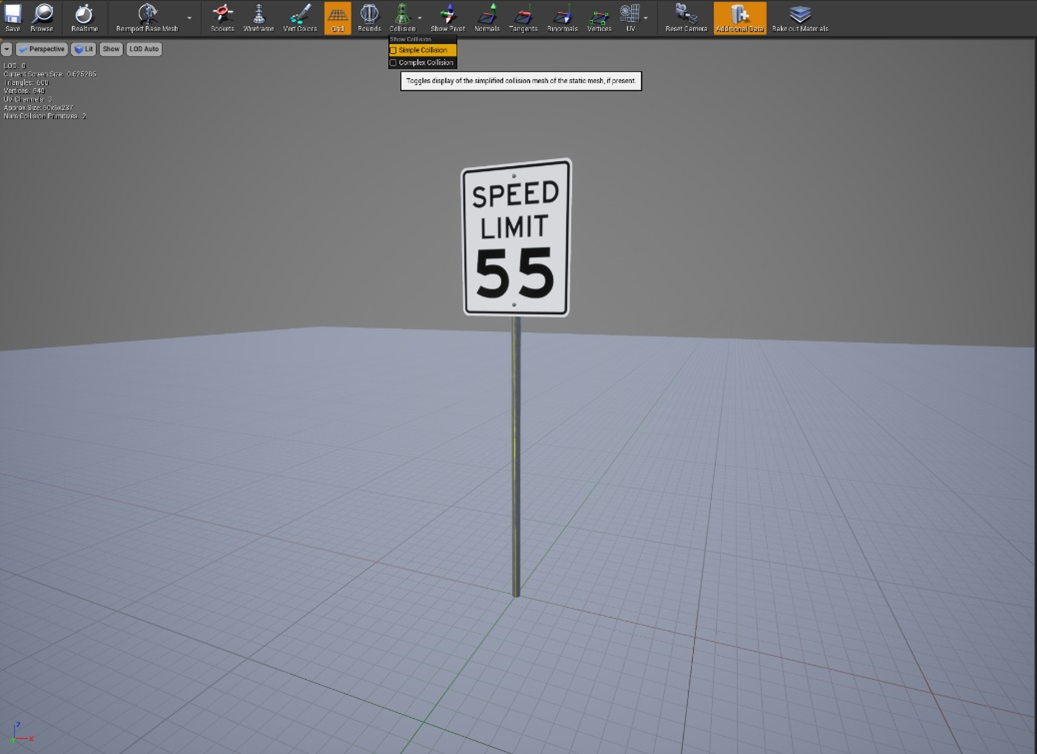
In the Static Mesh window of this asset, click on Collison → Check the 'simple collision' box
-
The bounding boxes of the current asset will be visible
-
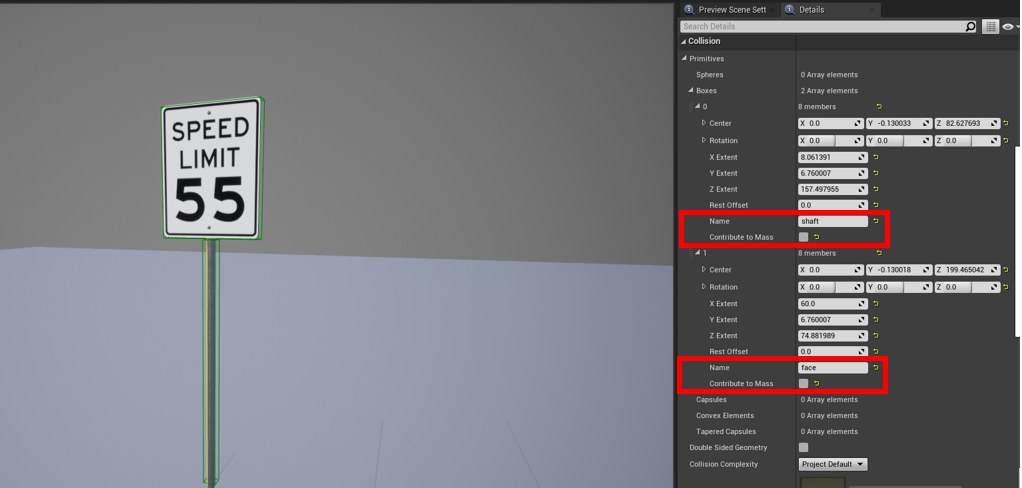
Under Details→Collision→Primitives→Boxes, the existing bounding boxes are visible along with their names. The actual sign is the 'face', and the pole is the 'shaft'
-
Uncheck the ‘Contribute to Mass’ parameter so the box only serves annotation purposes. This disables the overall mass of the added shape.
-
Click on ‘Save’ on the top left corner.
Setting up the C++ client for a Traffic Sign
This section of the document explains how to modify code on the camera_sensor.cpp client example to specifically extract only the sign’s 2D bounding box with the label ‘face’ using annotations.
fc_config.annotation.desired_tags = {"traffic_sign"};
    for (auto &bbox : annotation.second.bounding_boxes_2d)
            if(bbox.name == "face") {
                cv::rectangle(img, cv::Point(int(bbox.xmin), int(bbox.ymin)),
                cv::Point(int(bbox.xmax), int(bbox.ymax)),
                cv::Scalar(0, 0, 255));
            }
Modifying Bounding Boxes on a Streetlight
The goal of this section is to modify existing bounding boxes on a streetlight’s static mesh and display only the desired region of interest
-
Open the
Content Browseron the monoDrive Scenario Editor. -
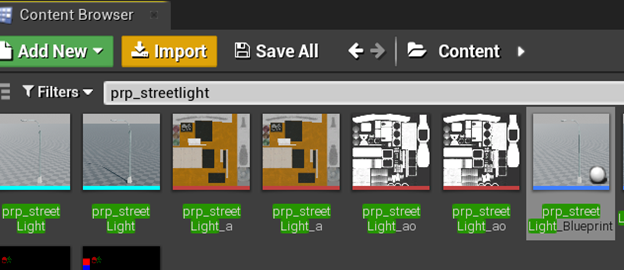
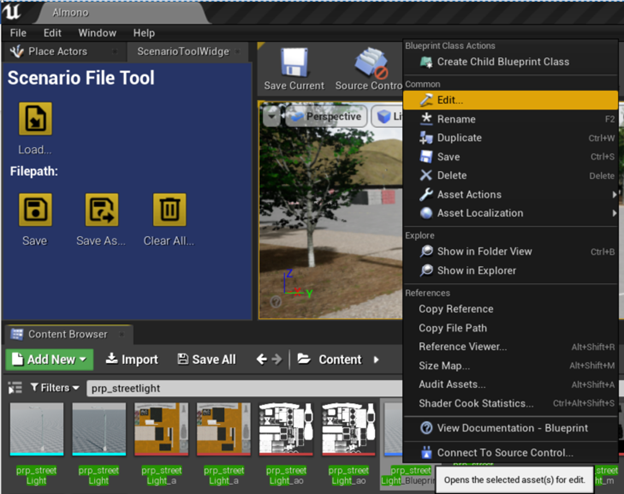
Look for “prp_streetlight” under Content (see image below). Select prp_streetLight_Blueprint.
-
Right click and select ‘Edit’. This opens the Blueprint editor window.
-
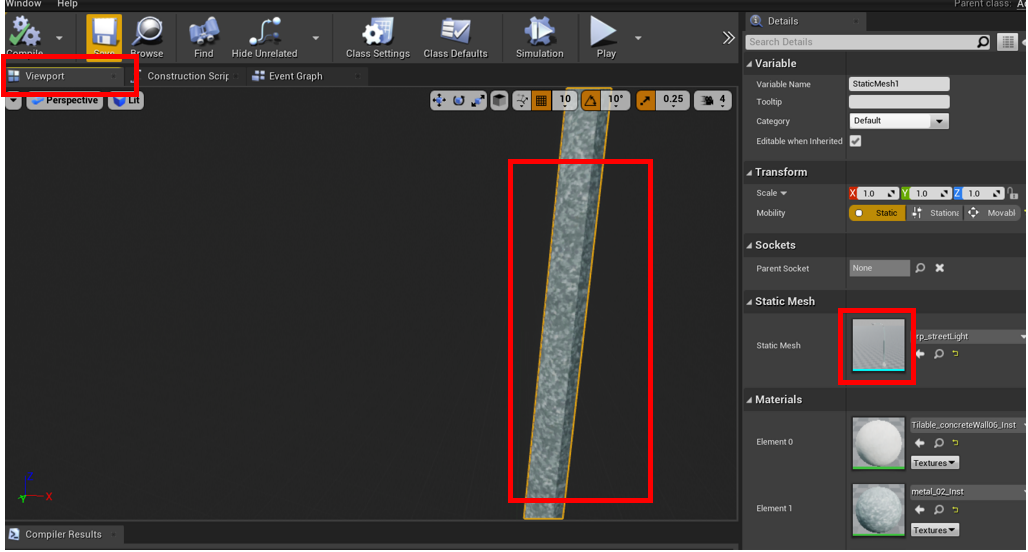
Click on Viewport.
A. Click on the streetlight.
B. Double click on the Static Mesh component of the streetlight under 'Details' as shown in the image below.
-
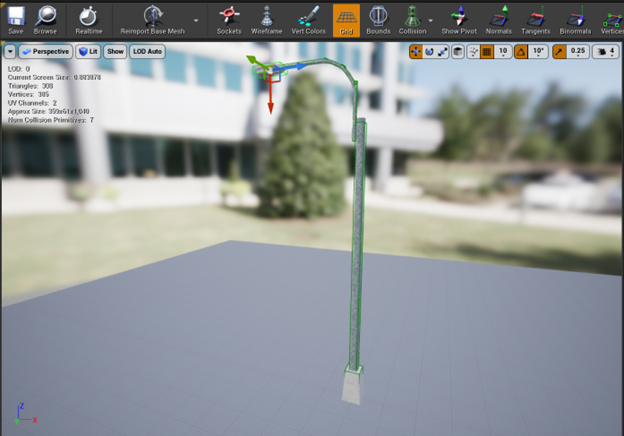
Select Collision on the top of the screen and check the ‘Simple Collision’ box
-
Once selected, all the bounding boxes for the current asset will be visible (as seen in the above image).
-
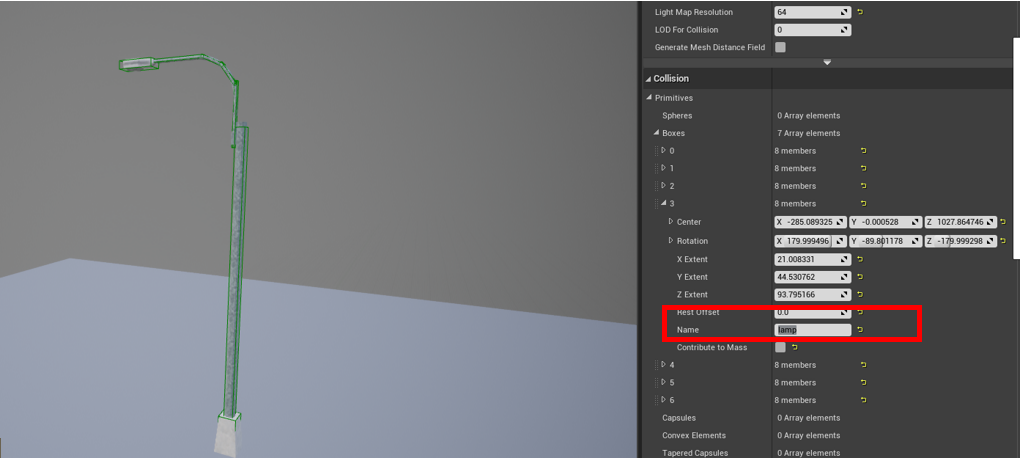
Select bounding box 3 under Details→Collision→Boxes and expand it.
-
Modify the Name parameter of Box 3. The image shown below illustrates the ‘Name’ updated as 'lamp'. Box 3 is the lamp portion of the streetlight.
-
Uncheck the ‘Contribute to Mass’ parameter so the box only serves annotation purposes. This disables the overall mass of the added shape.
-
Click on Save (top left corner).
Setting up the C++ client for a Streetlight
This section of the document explains how to modify code on the camera_sensor.cpp client example to specifically extract the above modified 2D bounding box with the label ‘lamp’ using annotations.
fc_config.annotation.desired_tags = {"street_light"};
    for (auto &bbox : annotation.second.bounding_boxes_2d)
               if(bbox.name == "lamp") {
                cv::rectangle(img, cv::Point(int(bbox.xmin), int(bbox.ymin)),
                              cv::Point(int(bbox.xmax), int(bbox.ymax)),
                              cv::Scalar(0, 0, 255));
               }